
Soups & Stews
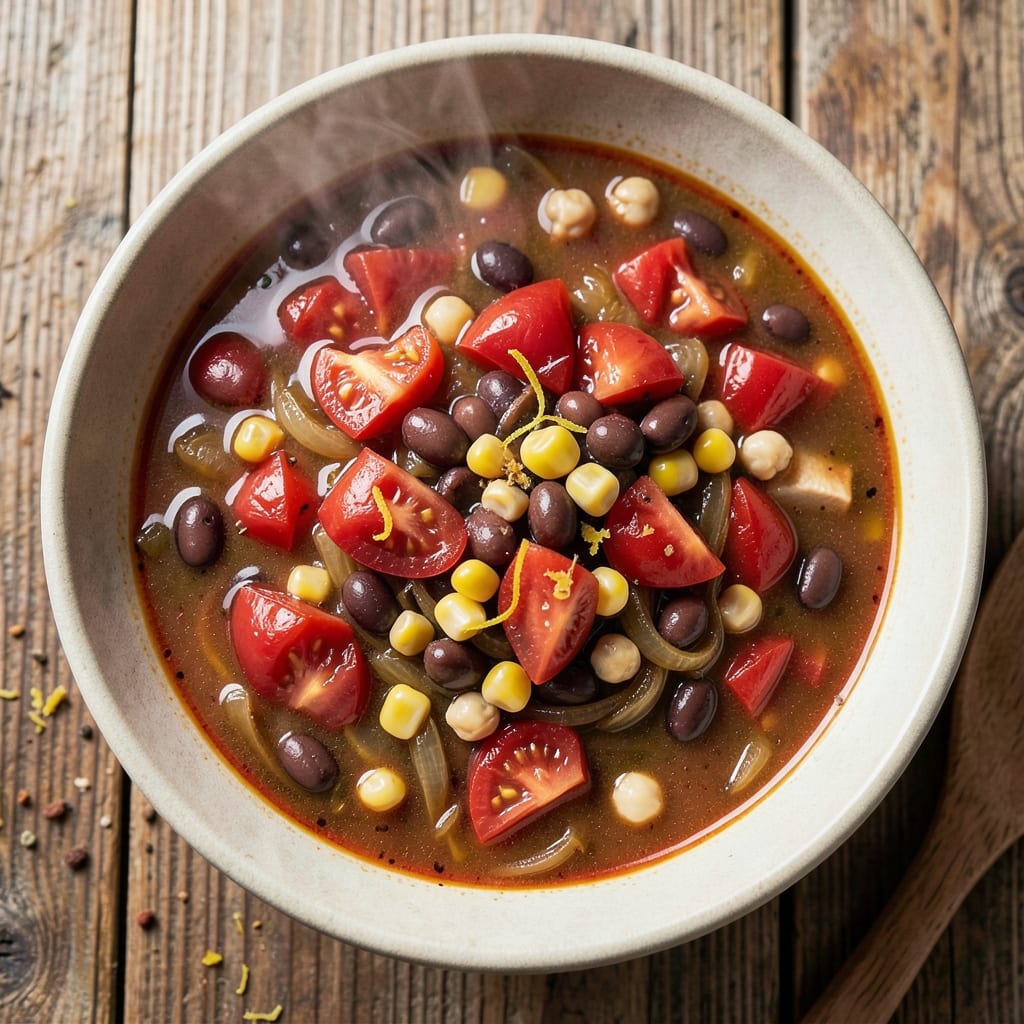
This 9-can soup recipe transforms pantry staples into a hearty, restaurant-worthy meal that feeds six without breaking the bank. The beauty lies in its simplicity: nine cans of beans, tomatoes, broth, and vegetables come together to create a rich, layered broth with tender ingredients that practically melt in your mouth. I developed this recipe during a particularly busy month when I needed a foolproof solution that delivered maximum flavor with minimal effort.
The magic happens during the 30-minute simmer on the stovetop (or 6 hours in a slow cooker), where the flavors meld into a harmonious blend. The secret to depth is toasting spices in the pot before adding the broth—this creates a flavorful base that elevates every ingredient. You'll end up with a soup that's both comforting and satisfying, packed with protein and vegetables without requiring fresh produce or complicated techniques.
What makes this recipe stand out is its versatility—it works equally well as a weeknight dinner or a meal prep solution. The texture is perfect: creamy from the beans and tomatoes, with just enough body from the broth to hold everything together. Each spoonful delivers a balance of savory, slightly sweet, and tangy notes that keep you reaching for more.
Serve it as-is for a clean, minimalist presentation, or top with fresh herbs, a drizzle of olive oil, or a sprinkle of cheese for added richness. The best part? You'll have leftovers that taste just as good the next day. Let's get started on this effortless, budget-friendly masterpiece.
Ingredients for 9 can soup
Nine cans of pantry staples create restaurant-worthy flavor with zero fresh produce needed.
| Ingredient | Amount | Notes |
|---|---|---|
| Chicken or Vegetable Broth 💧 | 6 cups | Low-sodium preferred for flavor control |
| Diced Tomatoes (San Marzano preferred) 🍅 | 2 cans | 28 oz can, undrained for texture |
| Black Beans 🌿 | 2 cans | 15 oz cans, drained and rinsed |
| Kidney Beans 🌿 | 1 can | 15 oz can, drained and rinsed |
| Corn Kernels 🌽 | 1 can | 15 oz can, drained |
| Chickpeas 🌿 | 1 can | 15 oz can, drained and rinsed |
| Chicken Breast (optional) 🍗 | 1 ½ lb | Boneless, skinless, cubed |
| Onion 🧅 | 1 whole | Medium yellow, diced |
| Garlic Cloves 🧄 | 4 cloves | Fresh, minced |
| Ground Cumin 🌿 | 1 tbsp | Toasted for deeper flavor |
| Smoked Paprika 🌶️ | 1 tsp | For smoky depth |
| Salt 🧂 | 1 tsp | Kosher or sea salt |
| Black Pepper 🌶️ | ½ tsp | Freshly ground preferred |
| Olive Oil 🫒 | 2 tbsp | Extra-virgin for richness |
The broth is your flavor foundation—low-sodium lets you control the seasoning. Chicken broth adds depth, but vegetable works too if you're vegetarian. For the beans, no-soak varieties save time, and draining them prevents a watery soup. I grab my cans from the store's international aisle—San Marzano tomatoes and Mexican-style black beans have the best texture. The optional chicken breast? Cubed and browned first—it adds protein without overpowering. Toast your spices in the olive oil before adding broth; this simple step makes all the difference (trust me on this).
No San Marzano tomatoes? Any good-quality diced tomatoes work—just check for no added salt. Swap kidney beans for white beans or lentils if needed. The corn can be frozen and thawed (no need to drain). For extra richness, stir in a splash of coconut milk at the end. Need to make it spicier? Add a pinch of cayenne or a dash of hot sauce. The olive oil matters here—use something fruity, not the cheap stuff. And if you're short on time, pre-chopped onions from the freezer section work perfectly.
This soup tastes even better the next day—3-4 days in the fridge, 3 months frozen. I double the batch and freeze half for lazy days. To reheat, warm on the stove with a splash of broth or water. The texture gets creamier as it sits, so don't rush it. For serving, a sprinkle of fresh cilantro or parsley brightens it up instantly. Leftovers? Perfect for meal prep—just portion into containers before freezing.
Why You'll Love This Recipe
- Pantry in Minutes: I swear by this recipe when I’ve got nothing but cans and broth staring back at me. Open, dump, stir—no chopping, no fuss. The San Marzano tomatoes alone make it taste like you slaved over it.
- Rich, Layered Taste: That combo of kidney beans and black beans? Deep, smoky, and just sweet enough from the tomatoes. The corn adds a little crunch—like a hug in a bowl.
- Meal Prep MVP: I make a double batch on Sundays and freeze half. Reheats in seconds, and the flavors only get better after a day or two. (Yes, even on a Tuesday night.)
- Budget-Friendly Feast: Nine cans might sound like a lot, but it stretches to feed four for three meals—or six for two. Honestly, it’s my go-to when I’m broke or lazy. Either way, everyone wins.
Step-by-step instructions for building a hearty nine-can soup
Transform pantry staples into a restaurant-quality bowl of soup with this straightforward, flavor-packed method.
Sauté the Aromatic Base
Heat the 2 tablespoons olive oil in a large Dutch oven or heavy pot over medium heat. Add the diced onion and cook for 5-6 minutes until softened and translucent, stirring occasionally. Here's where the magic starts—you'll notice the onions release their sweetness and begin to caramelize slightly at the edges.
Add the 4 minced garlic cloves and cook for another 30 seconds until fragrant. The garlic should sizzle gently but not burn—if it starts to darken too quickly, reduce the heat to medium-low. This aromatic foundation will carry through every spoonful of your soup, so don't rush this step. I like to press the garlic lightly with a wooden spoon to release its oils fully into the pot.
Toast the Spices for Depth
Add the 1 tablespoon ground cumin and 1 teaspoon smoked paprika to the pot. Stir constantly for 30 seconds until the spices become fragrant and the cumin starts to darken slightly. This toasting step develops their flavors and prevents them from tasting raw in the finished soup.
Here's the thing—smoked paprika adds that subtle campfire aroma that makes this soup taste like it simmered all day. If you're using pre-toasted cumin, skip this step, but if you're using regular ground cumin, toasting makes all the difference. You'll know it's ready when the spices coat the onions evenly and fill your kitchen with their warm, earthy aroma.
Build the Soup Foundation
Pour in the 6 cups chicken or vegetable broth and bring the mixture to a gentle boil over high heat. Once boiling, reduce the heat to medium-low and add the 2 cans diced tomatoes (undrained). The undrained tomatoes add natural acidity and prevent the soup from becoming too thick as it simmers.
Next, add the 2 cans black beans, 1 can kidney beans, 1 can corn kernels, and 1 can chickpeas. Stir gently to combine, making sure all the beans and legumes are submerged in the broth. This is where the soup starts to come together—you'll see the flavors melding as the beans begin to warm through. Let the mixture simmer uncovered for 15 minutes to allow the flavors to develop.
Incorporate the Protein (If Using)
If you're using the optional 1.5 lb chicken breast, cut it into ½-inch cubes and add it to the pot during the last 10 minutes of simmering. The chicken should cook through completely in this time, reaching an internal temperature of 165°F. You'll know it's done when the meat is no longer pink in the center and flakes easily with a fork.
If you're making this a vegetarian version, skip the chicken and add the 1 teaspoon salt and ½ teaspoon black pepper now. For the chicken version, add the seasonings after removing the chicken to avoid over-salting the meat. Stir well to distribute the seasonings evenly throughout the soup. The soup should now have a rich, complex base with all the ingredients working together harmoniously.
Simmer and Adjust for Perfection
Continue simmering the soup uncovered for an additional 10-15 minutes to allow the flavors to meld fully. Taste and adjust the seasoning as needed—this is where you can fine-tune the balance of salt, acidity, and spice. If the soup needs more salt, add it gradually, tasting as you go. If it's too thick, stir in ½ cup water or more broth to reach your desired consistency.
The soup is ready when it's hot, flavorful, and has a consistency that coats the back of a spoon but isn't gluey. Real talk: the longer it simmers, the deeper the flavors become, but don't let it boil vigorously after adding the seasonings or it may break and become watery. Serve immediately with crusty bread or over rice to soak up every last drop of that delicious broth.
Pro Tips For Making 9 Can Soup
- Simmer Slow and Steady: Start with a rolling boil, then drop the heat to a gentle simmer—like a lazy Sunday morning, not a pressure cooker. After 15 minutes, taste the broth: if it’s still too sharp, let it bubble low for another 10. The beans and tomatoes need time to soften and marry, not scorch. (Yes, even if you’re impatient like me.)
- Drain and Rinse Beans: Skip the salted canned beans—drain them, then rinse under cold water to wash away excess sodium. This keeps the soup from tasting like a science experiment gone wrong. Pro move: Pat them dry with a towel if you’re worried about mushiness later.
- Add Corn Last: Toss the corn kernels in at the very end—just 3–5 minutes before serving. They’ll stay bright and tender instead of turning to mush. (I learned this the hard way after serving a bowl of sad, waterlogged corn.)
- Upgrade with Aromatics: Sauté 1 diced onion and 2 minced garlic cloves in olive oil for 3 minutes before adding broth—it adds depth without extra effort. Or, if you’re lazy, just toss in a bouillon cube with the broth instead of plain water. Small tweaks, big flavor.
Storing and reheating this dish
Refrigerator Storage
Let your nine-can soup cool completely before transferring it to airtight containers—I use glass Pyrex with snap-on lids for best results. Store at 40°F or below for up to 4 days, but honestly? The flavors get even better after the first 24 hours as everything melds together. The beans soften further, and the broth deepens in complexity. Just
Freezer-Friendly Tips
This soup freezes beautifully for up to 3 months without losing texture or flavor. I recommend quart-sized freezer bags (like Glad brand) because they lay flat, saving space, and thaw faster than containers. Squeeze out excess air before sealing to prevent freezer burn—this keeps the soup tasting fresh. Label with the date to track freshness. Pro tip: Portion into single-serving bags for easy grab-and-go meals later. ❄️
Stovetop Reheating
My preferred method is stovetop reheating because it preserves the best texture. Pour the soup into a heavy-bottomed pot (like Le Creuset) and warm over medium-low heat for 10-15 minutes, stirring occasionally. Add ¼ cup water or broth if it looks too thick—this prevents sticking and keeps the beans tender. Taste and adjust seasoning after reheating; the flavors often mellow slightly during storage. 🔥
Microwave Shortcuts
For quick lunches, transfer a portion to a microwave-safe bowl and cover with a damp paper towel. Heat on 70% power for 2-3 minutes, stir, then continue in 30-second intervals until steaming hot. Avoid overcooking—microwaves can make beans mushy if left too long. A splash of broth revives the texture if needed. Perfect for busy weekdays when you're short on time. ⏱️
Slow Cooker Revival
If you have leftovers in a slow cooker, set it to low heat for 2-3 hours with the lid slightly ajar. This gentle reheating method keeps the soup creamy and prevents scorching. Stir every 30 minutes to distribute heat evenly. The slow cooker's steady warmth ensures even heating without breaking down the beans further. Ideal for reheating larger batches when you're prepping for the week ahead. 🍲
Garnish Before Serving
After reheating, brighten up the soup with fresh toppings. A sprinkle of cilantro or parsley adds freshness, while a drizzle of olive oil enhances richness. For extra crunch, toast pumpkin seeds in a dry pan for 2 minutes and sprinkle on top. These finishing touches elevate the dish and make it feel restaurant-quality every time. 🌿
Nutrition facts
Frequently asked questions
Can I substitute any of the beans in this recipe?
Swap kidney beans for white beans, lentils, or pinto beans—they all work beautifully. The key is maintaining a mix of textures and flavors. For example, try 1 can white beans + 1 can lentils instead of kidney beans to keep the soup hearty but slightly lighter. Just adjust the seasoning afterward since different beans absorb flavors differently.
How do I make this soup spicier?
Add ½ teaspoon cayenne pepper or 1 teaspoon hot sauce at the end of cooking. For extra heat, toast ½ teaspoon red pepper flakes with the cumin and paprika. If you love smoky flavors, swap the smoked paprika for chipotle powder—it adds a deep, slightly sweet heat that pairs perfectly with the beans.
Can I make this in a slow cooker?
Yes! Sauté the onions, garlic, and spices first, then transfer everything to the slow cooker. Cook on low for 6-8 hours or high for 3-4 hours. The slow cooker enhances the flavors even more, making the broth richer. Just stir occasionally and add a splash of broth if it gets too thick during cooking.
Why does my soup taste bland after reheating?
This happens when the flavors mellow during storage. Fix it by adding a splash of lemon juice or vinegar (just ½ teaspoon) to brighten the flavors, or stir in 1 tablespoon tomato paste for depth. Another trick: toast ½ teaspoon cumin in a dry pan for 30 seconds and sprinkle it over the reheated soup to revive the spices.
What’s the best way to serve this soup?
Pair it with crusty bread, cornbread, or warm tortillas for dipping. For a complete meal, serve over white rice or quinoa to stretch it further. Garnish with fresh cilantro, avocado slices, or a dollop of Greek yogurt for extra freshness. The soup also reheats beautifully for lunches—just portion into containers before freezing.