
Soups & Stews
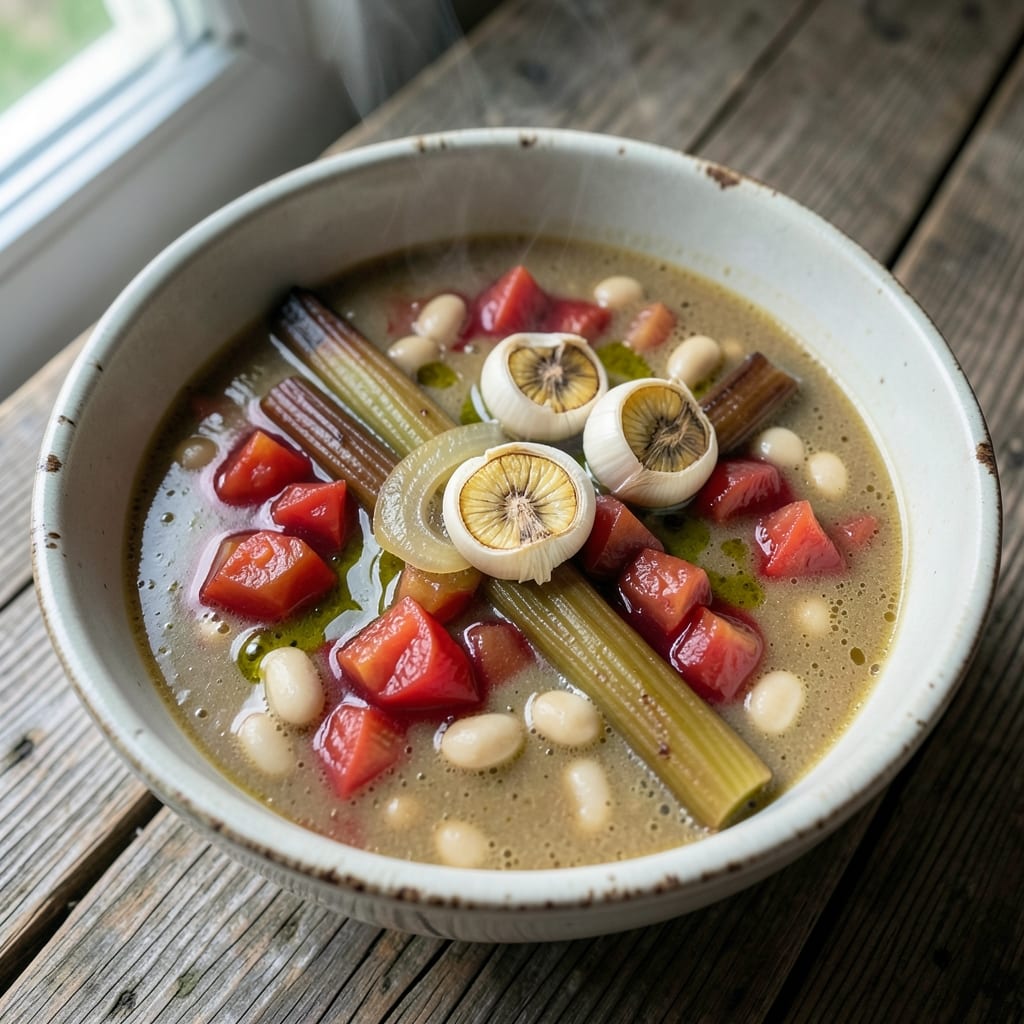
This 3-can soup recipe transforms pantry staples into a rich, layered meal without requiring a blender or fancy technique. The beauty lies in its simplicity: three well-chosen cans of beans, tomatoes, or broth form the foundation, while sautéed aromatics and herbs build depth. I developed this recipe during a particularly busy week when I needed nourishing food with minimal effort—it never fails to deliver satisfying results.
The magic happens in the base: onions, garlic, and celery form a flavorful soffritto that cooks down into the soup, creating a rich, aromatic foundation. Unlike many canned soups, this version avoids the mushy texture by using whole ingredients and letting them simmer together. The result is a hearty soup with distinct layers of flavor—savory beans, tangy tomatoes, and umami-rich broth—all balanced by fresh herbs.
What makes this recipe truly special is its versatility. Swap the canned ingredients based on what you have, adjust the seasoning to taste, and finish with garnishes like fresh parsley or a drizzle of olive oil. It’s the kind of soup that tastes even better the next day, making it perfect for meal prep or feeding a crowd on short notice.
No special equipment is needed beyond a large pot and a wooden spoon. The instructions are straightforward, and the ingredients are likely already in your pantry. Let’s turn those cans into a comforting, flavorful meal that feels like a homemade hug in a bowl.
Ingredients for 3 can soup
Pantry staples meet aromatic sophistication in this effortless three-can soup creation.
| Ingredient | Amount | Notes |
|---|---|---|
| Yellow Onion 🧅 | 1 ½ cups | Diced, roughly 1 medium onion |
| Celery Stalks 🥬 | 3 whole | Diced, including leaves for flavor |
| Garlic Cloves 🧄 | 4 cloves | Minced, not pre-minced jarred garlic |
| Vegetable Broth 💧 | 1 can | 14.5 oz can, low-sodium preferred |
| Diced Tomatoes 🍅 | 1 can | 14.5 oz can, San Marzano preferred |
| White Beans 🫘 | 1 can | 15 oz can, drained and rinsed |
| Olive Oil 🫒 | ¼ cup | Extra-virgin, fruity variety |
| Dried Thyme 🌿 | 1 tsp | Or 1 tbsp fresh, finely chopped |
| Dried Oregano 🍃 | 1 tsp | Mexican oregano for authentic flavor |
| Ground Black Pepper 🌶️ | ½ tsp | Freshly cracked, not pre-ground |
| Bay Leaves 🍃 | 2 whole | Removed before serving |
| Salt 🧂 | 1 ½ tsp | Diamond Crystal kosher salt |
| Fresh Parsley 🌿 | ¼ cup | Chopped, for garnish only |
| Lemon Juice 🍋 | 1 tbsp | Freshly squeezed, optional finish |
The foundation begins with the aromatic trio: yellow onion, celery, and garlic—what chefs call a soffritto—which should be cooked until soft and translucent, not browned. San Marzano diced tomatoes elevate the flavor profile with their natural sweetness and acidity, while low-sodium vegetable broth ensures you control the seasoning. For the beans, cannellini or great northern work best—their creamy texture holds up beautifully. Trader Joe's carries excellent canned options, but store-brand beans often deliver comparable quality at a fraction of the cost. Look for cans without added salt to maintain flavor balance. The dried herbs—thyme and oregano—should be from a reputable source like Penzeys or your grocery store's bulk section, where they retain their potency longer than pre-mixed seasonings.
No San Marzano tomatoes? Crushed tomatoes or even tomato paste work in a pinch, though the texture will differ slightly. Substituting chickpeas or kidney beans for white beans adds protein variety without compromising structure. The olive oil is non-negotiable for sautéing—extra-virgin with a peppery finish ensures the aromatics develop properly. If you're using fresh herbs, parsley and basil can both work, though parsley's bright note complements the dish better. For those without fresh parsley, dried parsley flakes at half the quantity provide a similar visual and flavor impact. The bay leaves add subtle earthiness but must be removed before serving—no one wants a leafy surprise in their soup.
This soup improves with time, so make a double batch if you have the space. It reheats beautifully—simmer gently on the stove or microwave with a splash of water to restore creaminess. Stores for 4-5 days in the fridge, though the flavors deepen after the first 24 hours. For longer storage, freeze in airtight containers for up to 3 months, though the beans may soften slightly upon thawing. The lemon juice should be added just before serving to brighten the dish without altering the texture of the reheated soup. Garnish with extra herbs and a drizzle of high-quality olive oil to elevate the presentation—it's the little touches that make pantry meals feel special.
Why You'll Love This Recipe
- No-Chop Night Saved: I swear by this when I’m too tired to dice anything. Toss in a roughly chopped onion and celery stalks—no need for precision—then let the broth and tomatoes do the work while you stir. Five minutes of active time, and the flavors meld into something rich and satisfying.
- Garlic-Kissed Depth: That one crushed garlic clove? It’s the secret weapon. Simmered in vegetable broth with diced tomatoes, it builds layers of warmth you won’t find in store-bought soups. Honestly, the first time I made this, my partner asked for seconds before the bowl even hit the table.
- Prep-Ahead Powerhouse: Make a double batch on Sunday, and you’ve got lunch covered for the week. The flavors only get better as it sits—my freezer’s stocked with portions for those days when takeout feels like too much effort. (Yes, even on a Tuesday night.)
- Pantry Magic: Three cans, a few fresh staples, and you’re golden. No fancy ingredients, no last-minute grocery runs—just whatever’s lurking in your cupboard. Between us, I’ve made this soup with kidney beans, corn, or even tuna when I’m feeling adventurous. Budget-friendly doesn’t mean boring.
Step-by-step instructions for hearty vegetable soup
This method transforms pantry staples into restaurant-quality soup with rich layers of flavor.
Sauté the Vegetable Base
Heat the 0.25 cup olive oil in a large Dutch oven over medium heat. Add the 1.5 cups diced yellow onion and 3 whole diced celery stalks, cooking for 5-6 minutes until the vegetables soften and begin to release their natural juices. The onions should turn translucent and the celery should yield to gentle pressure with a wooden spoon.
Add the 4 cloves minced garlic and cook for 30 seconds until fragrant. This step builds the flavor foundation - don't rush it. I like to stir occasionally to prevent browning, which can make the soup bitter. The garlic should smell pungent and aromatic when properly cooked.
Develop the Flavor Layers
Add the 1 tsp dried thyme, 1 tsp dried oregano, 0.5 tsp ground black pepper, and 1.5 tsp salt to the pot, stirring to coat the vegetables evenly. Cook for 1 minute to toast the spices slightly, which enhances their flavor profile. This is where the soup's depth begins to develop.
Pour in the 1 can vegetable broth and 1 can diced tomatoes, scraping up any browned bits from the bottom of the pot. Add the 2 whole bay leaves and bring the mixture to a gentle simmer. The broth should bubble steadily but not vigorously - you're looking for a controlled simmer that allows the flavors to meld without losing moisture.
Simmer and Incorporate Beans
Reduce heat to low-medium and let the soup simmer uncovered for 15 minutes. This initial simmering time allows the vegetables to soften further and the flavors to develop. Stir occasionally to prevent the ingredients from sticking to the bottom.
Add the 1 can drained and rinsed white beans to the pot. The beans will absorb some of the liquid as they warm through. Let the soup continue simmering for another 10 minutes until all the vegetables are tender and the flavors have fully integrated. You should notice the soup developing a rich, aromatic steam that fills your kitchen.
Finish and Garnish
Remove the 2 whole bay leaves from the soup using a slotted spoon. Stir in the 0.25 cup chopped fresh parsley and 1 tbsp lemon juice (if using). The parsley adds freshness while the lemon juice brightens the overall flavor profile. Taste and adjust seasoning if needed - you may need to add a pinch more salt or a splash of lemon juice for balance.
Ladle the soup into bowls and serve immediately. The final presentation should showcase the vibrant colors of the vegetables and the creamy texture of the beans. Each spoonful should deliver a harmonious blend of savory, herby, and slightly tangy flavors that make this simple pantry soup so satisfying.
Pro Tips For Making 3 Can Soup
- SWEEAT NOT SOAR: Cook your onions and celery at a steady simmer—not a rolling boil—until they’re translucent but not browned. I learned this the hard way: fast heat burns the edges before the center softens, leaving you with a bitter, uneven base that fights the tomatoes later.
- MINCE GARLIC FINE: Use a knife instead of a press for garlic—chop those cloves into tiny, even pieces so they dissolve completely into the broth. Pressed garlic stays in clumps and can turn mushy, making the soup taste uneven. (Yes, it takes 30 seconds extra.)
- DILUTE THE BROTH GRADUALLY: Add the vegetable broth in two batches: half first to simmer the veggies, then the rest after the cans are open. This prevents the soup from turning watery too fast—especially if you’re using low-sodium broth or extra tomatoes.
- SALT THE CANS FIRST: Open the cans of tomatoes and broth, then sprinkle each with a pinch of salt before dumping them in. The flavor penetrates better this way, and you won’t end up with a bland base that needs fixing later. (Trust me, you’ll taste the difference.)
Flavor customization for this 3 can soup
Spicy Kick Options
For heat lovers, add ½ tsp smoked paprika and ¼ tsp cayenne with the dried herbs. This creates a subtle smoky depth while raising the temperature. I like to finish with a sprinkle of chili flakes or a dash of hot sauce right before serving—just ½ tsp is enough to wake up the flavors without overpowering the delicate bean and tomato balance. 🌶️
Creamy Variations
Transform this soup into a creamy version by stirring in ½ cup coconut milk or ¼ cup Greek yogurt at the end. For extra richness, melt 1 tbsp butter into the simmered vegetables before adding the broth. I recommend Trader Joe's full-fat coconut milk—it blends seamlessly without altering the soup's texture. For a dairy-free option, silken tofu blended lightly adds creaminess without changing the consistency.
Herb Swaps
Trade the thyme and oregano for 1 tsp dried rosemary and ½ tsp dried basil for a Mediterranean twist. If you prefer a more rustic flavor, 1 tsp dried sage and ½ tsp fennel seeds add earthy depth. Fresh herbs like cilantro or basil work beautifully too—just chop ¼ cup and stir in at the end. I find Penzeys dried herbs hold up best in pantry-based recipes.
Protein Upgrades
Boost the protein by adding ½ lb smoked sausage (like Johnsonville Italian), sliced and browned before the beans. For a vegetarian option, ½ cup chickpeas or ½ cup lentils add heartiness. If you love seafood, ½ cup cooked shrimp or ½ cup white fish (like cod) can be gently folded in during the last 5 minutes of simmering. The key is to keep the cooking time short to avoid overcooking the delicate proteins.
Acid Balance Adjustments
Brighten the soup with 1 tbsp apple cider vinegar or 1 tbsp balsamic vinegar for a tangy contrast. If you prefer a sweeter note, add 1 tsp honey or 1 tsp maple syrup to balance the acidity. I often finish with a squeeze of lemon juice—just 1 tbsp—to cut through the richness of the beans and tomatoes. The acidity helps the flavors pop and keeps the soup feeling fresh, even after reheating.
Umami Boosters
Elevate the depth with 1 tsp fish sauce or 1 tsp soy sauce for an umami punch. A splash of Worcestershire sauce (just ½ tsp) adds complexity without overpowering. For a vegetarian-friendly option, 1 tsp miso paste (dissolved in a little broth) brings rich, savory notes. I keep Lee Kum Kee fish sauce and Hibiki miso on hand for these quick flavor upgrades—they make a world of difference in pantry-based dishes. 💫
Nutrition facts
Frequently asked questions
Can I use any three cans for this soup?
The recipe works best with a balance of flavors: beans (for protein), tomatoes (for acidity), and broth (for depth). You can swap similar ingredients—like chickpeas for beans or crushed tomatoes for diced—but avoid all broth-based cans (like chicken noodle soup) without adding fresh vegetables. The key is maintaining that savory-acidic-creamy balance.
Why do you recommend simmering uncovered?
Simmering uncovered allows excess moisture to evaporate, concentrating the flavors and preventing a watery texture. It also helps develop a richer, more complex taste through gentle reduction. If you're concerned about sticking, just stir occasionally—no need to cover until the very end. The uncovered method is especially important for pantry-based soups where fresh ingredients are limited.
Can I make this soup in a slow cooker? Sauté the onion, celery, and garlic first, then transfer everything to your slow cooker. Cook on low for 6-7 hours or high for 3-4 hours, stirring occasionally. The slow cooker's gentle heat enhances the flavors even more. Just
What if my soup tastes too salty?
If using low-sodium cans, this shouldn't happen, but if it does, add ½ cup plain yogurt or sour cream to dilute the saltiness while adding creaminess. For broth-heavy soups, you can also add ½ cup water or extra broth and simmer for 5-10 minutes to even out the flavor. Taste as you go—small adjustments make all the difference!
How can I make this soup kid-friendly?
Blend a portion of the soup with an immersion blender for a smoother texture, or simply mash some of the beans with a fork. Reduce the garlic and herbs slightly (use ½ tsp thyme instead of 1 tsp) and add a pinch of sugar to balance acidity. Serve with buttered bread or crackers for dipping—kids love interactive elements! The basic structure remains the same, just gentler flavors.